This page includes documentation for the following:
Base plugin
Installation
Follow these instructions to install the plugin:
- Login to your WordPress installation and go to the Plugins -> Add New page
- Enter “Fix Duplicates” in the search field and click “Search Plugins”
- Select “Fix Duplicates” from the results, click “Install Now” and wait for the plugin to be installed
- Once installed, click “Activate”
The plugin is now activated and ready for use.
Configuration
There are no settings for the base plugin – you’re good to go!
Managing Duplicates
To view duplicate entries, go to the Fix Duplicates -> Duplicate Entries page.
Definition: Duplicate titles are terms which have more than one title. Individual entries are the posts that have a duplicated title. For example, if there are two posts with a title of “Example”, this counts as 1 duplicate with 2 individual entries.
Section A
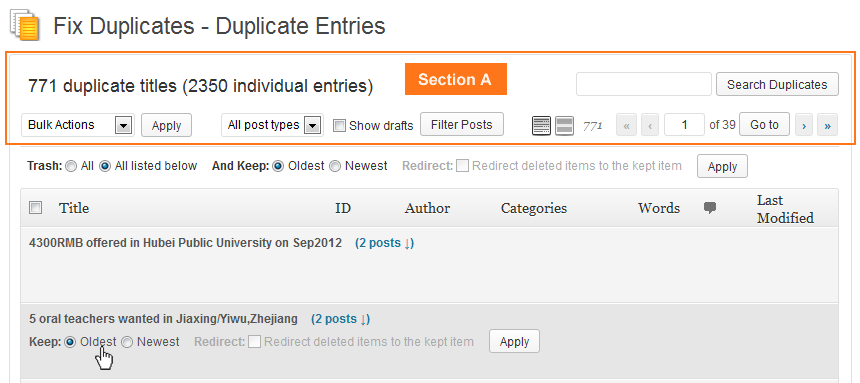
Screenshot of the Duplicates Entries page, highlighting section A
- Number of duplicate titles and individual entries: The number of duplicates / individual titles in the currently displayed list, based on search, post types, show drafts, etc. The numbers shown are for the entire list, not just the currently displayed page within that list.
- Search Duplicates: Search for duplicate entries containing the entered key phrase.
- Bulk Actions: Actions that apply to all *selected* posts on this page. Note that post aren’t shown by default and need to be made visible before they can be selected (see List View vs Expanded below). The only bulk action is Trash Selected, which moves selected posts to the Trash. Note that if you have the premium Redirection extension, this will not redirect trashed posts.
- Filter: Select which post types should be included in the list of duplicates and whether drafts should be shown.
- List View vs Expanded: Select whether to hide (List View) or show (Expanded) individual entries for each duplicate listed on the page. Individual entries can also be hidden / shown for each duplicate by clicking on the “(X posts ?)” link next to each duplicate title.
- Paging control. Navigate through the pages for the current list of duplicates.
Section B: Bulk Controls
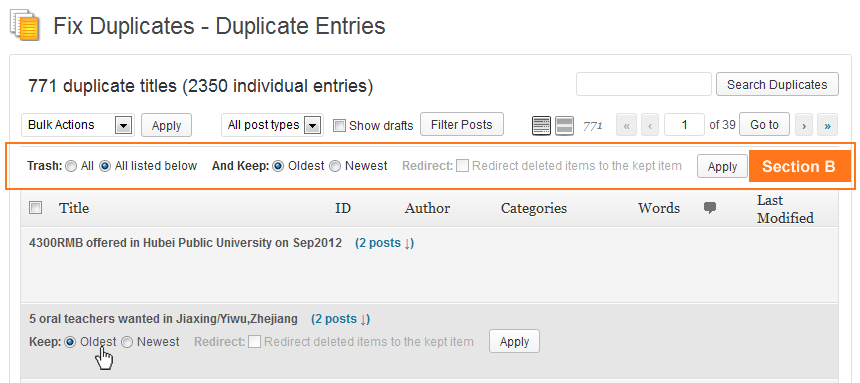
Screenshot of the Duplicates Entries page, highlighting section B
Trash:
- All: Not recommended. Delete the individual entries, keeping the newest / oldest (see next section), for all duplicates. This will take a long time, will bypass Trash, will not redirect posts and will not delete duplicates with the same date and time.
- All listed below: Trash the individual entries, keeping the newest / oldest (see next section), for all duplicates listed on the page below. It will not affect duplicates on subsequent pages.
And Keep:
- Oldest: The oldest individual entry for each duplicate will be kept. All other individual entries for that duplicated will be deleted.
- Newest: The newest individual entry for each duplicate will be kept. All other individual entries for that duplicated will be deleted.
Redirect: This is disabled unless the premium Redirection extension is purchased. This allows you to redirect the trashed items to the kept item (for each duplicate). This will only work if “All listed below” is chosen. It will not work for “All”.
Section C: Main table
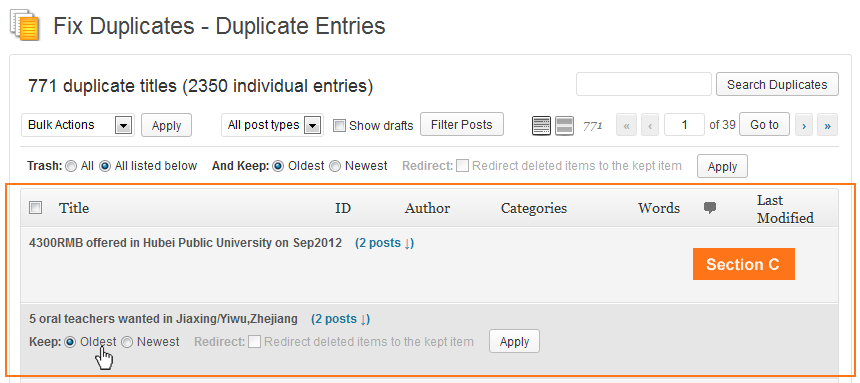
Screenshot of the Duplicates Entries page, highlighting section C
The table has the following columns:
- Select checkbox: Select individual entries for use with Bulk Actions. The checkbox in the header selects all displayed rows.
- Title: The title of the individual entries / posts.
- ID: The post ID of this resource (useful for working out which individual entry is which).
- Author: The author of the post.
- Categories: The categories of the post.
- Words: The number of words in the post (useful for checking whether items really are duplicates or not).
- Comments: The number of comments for this post (useful for deciding whether to trash posts, which results in the comments being lost).
- Last Modified: The date the post was last changed.
Note: Columns apply to individual entry rows. Individual entries are grouped together under the duplicate title control row and are not shown by default. The individual entries can be shown either by clicking on the “(X posts ?)” link next to each duplicate title, or by clicking the Expanded view mode button. The columns will make more sense once the rows are displayed.
The duplicate title control row shows the title and the number of individual ‘posts’ with that title. Clicking on the “(X posts ?)” link will show the individual entries. Hovering over the title will show the controls for that individual duplicate title, including whether to keep the oldest or newest post (trashing the rest) and whether to redirect the posts (only if you have the premium Redirection extension).
The individual entry row shows the information for each column for that entry. Hovering over the individual entry row will show the controls for that entry, including whether to trash or view the entry. If you have the premium Redirection extension, it will include links to trash and redirect the item to the newest or oldest post.
Restoring Deleted Duplicates
When items are trashed, as described above, they will be moved to the Trash. You can restore these the same way you can restore any trashed post. There is a link to the Trash in the Success message. Alternatively, you can navigate to the Trash screen by going to the Posts -> All Posts page and clicking the Trash link near the top.
If you are using the premium Redirection extension, then restoring an item from Trash will result in any redirects for the item being deleted. As a side note, deleting a post that is the destination of a redirect will result in the redirect being deleted.
Other Issues
If you leave the screen open for more than half a day and then try to use it, you may experience a “Are you sure you want to do this?” message. This is generated by the WordPress security system. You need use the menu to navigate to the page again before you can continue.
Redirection Extension
Installation
Note: the base plugin must be installed and activated before installing the Redirection extension.
Once you purchase the Redirection extension, you will receive an email containing a link to the download. To install the extension:
- Follow the instructions in the email to download the plugin file to your hard drive
- Login to your WordPress installation and go to the Plugins -> Add New page
- Click the “Upload” link / tab near the top of the page
- Click “Browse” and navigate to the plugin file downloaded in step 1
- Select the fix-duplicates-redirection.zip file and click “Open”
- Click “Install Now” and wait for the plugin to be installed
- Click “Activate Plugin”
- Go to the Fix Duplicates -> Redirection Activation page
- Enter the license key from the email and click “Activate License”
The plugin is now activated and ready for use.
Configuration
There are no settings for the Redirection extension – you’re good to go!
Redirecting Duplicates
For information on how to redirect entries being deleted, see the Managing Duplicates section in the base plugin documentation above.
Managing Redirects
Once redirects have been set up, you can manage them through the Fix Duplicates -> Redirects page. The following are listed for each redirect:
- the title of the deleted entry
- the URL of the deleted entry
- the URL that the deleted entry redirects to
- the number of times the redirect has been used
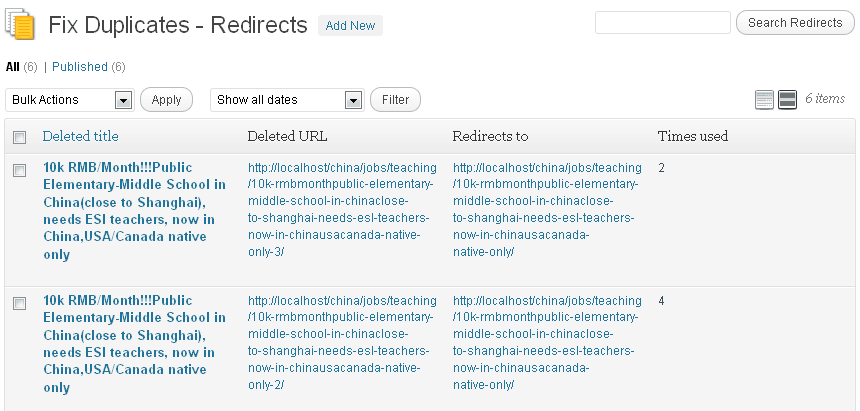
Screenshot of the Fix Duplicates – Redirection screen
You can edit or trash any of these redirects, either through hovering over the row in question until the controls appear, or by selecting the checkbox for rows in question and using Bulk Actions. You can also manually add redirects if you wish.